

Throughout most of winter we’re more than happy to ignore the garden in favour of a warm interior. Like a pub. There’s not much that needs doing outside, and there’s not much we want to do.
But sometimes a bright blue sky and crisp fresh air sets our gardening fingers twitching with pre-spring anticipation and we coil with shame that we’re not even slightly ready for the spring gardening onslaught. It’s at these moments we slip on our gardening boots, load up the thermos and tackle a few of these winter gardening tasks…
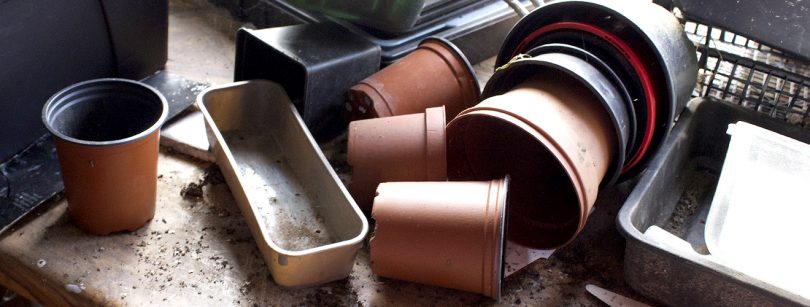
1 Clean pots
If you’re anything like us, plant pots and seed trays don’t get looked after during the growing season. They get filled; stuff may or may not grow; sometimes they get emptied and re-used; sometimes they get emptied and stuffed on a shelf; sometimes they get left lying around collecting whatever weed seeds drift onto their soily surface.
Now is the time to sort all that out.
Filled pots get emptied into the compost, damaged pots get discarded, and all the reusable pots get a brief scrub in hot water. Bits of lingering dirt may contain nasty things that can cause disease among new growth, so removing old compost will improve your chances of gardening success.
Finally, pots will be stacked in size order, new pots will be ordered to fill the gaps, and we’ll marvel at how much room has suddenly appeared on the shelf.
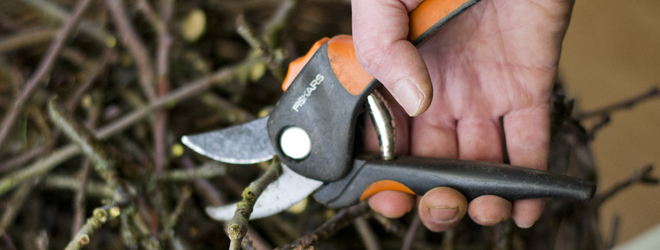
2 Audit canes, nets, etc
While we’re scrubbing the pots there’s every chance we’ll naturally move on to the plant labels scattered among them and give them a rub down ready for new plant names to be scrawled along their sides. We’ll then realise we’ve only recouped a small percentage of our labels from the allotment and begin a crusade to find more among the weeds that have taken over the brassica patch and beyond.
This in turn will lead us to uproot nets that cover nothing more than failed cauliflower and, in turn, wrestle canes from the netting’s unrelenting grip.
You see what’s happened here? One simple task of erasing ‘French Breakfast Radish’ from a 10cm long bit of plastic has turned into a whole root and branch clear out of gardening paraphernalia.
We’ll pretend we follow the kit collection by carefully auditing the items, throwing away anything too damaged, storing the rest neatly in its proper place, and ordering replacements. In reality we’ll probably chuck them all in the corner with the rake.
3 Tidy and mend raised beds
As with the pots, we’ll also routinely go round the raised beds prepping them ready for their new arrivals. This task includes removing any unwanted dead plants, clearing out slugs that have been hiding in the corners, and bashing in nails to secure any timbers that are loosening. All of our raised beds are fairly new, but give it a few more years and we might be assessing whether any need replacing.
They won’t get a full scrub and wood treatment like other timber built garden constructions for three reasons:
i) We don’t want the wood treatment leeching into the soil
ii) Raised beds are cheap to make, treatment is expensive
iii) We can’t be bothered
Beds that are lined up for early spring planting will be filled with suitable compost or manure, giving it a chance to settle nicely – but we don’t want to do this to early as rain can wash all the goodness away
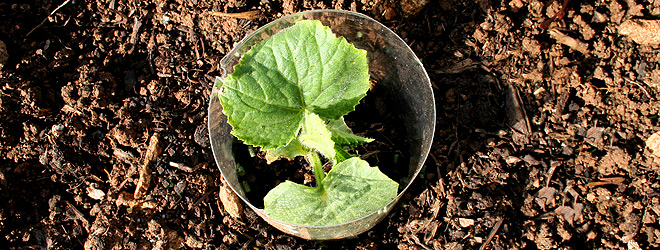
4 Warm up the soil
There are some seeds we like to sow a little ahead of spring, taking a gamble they’ll see off the frosts and make an advanced bid for growing stardom. Root veg make up most of this category.
To give them the best chance of survival it’s a good practice to warm up the soil ahead of sowing, a task which can be done now.
All that’s required is covering the patch of soil with some sort of winter coat. Fleece will do the job, although it’s fairly costly; you could use black bin bags, but you’ll then need a protection that lets the light in when it comes to sowing; so our preferred method is with bubble wrap. We get too much of it through the post so it’s good to recycle it for extra use. The wrap acts like a toasty duvet, with the air-filled bubbles raising its Tog factor to cosy heights. It’s durable, lasts for years, and is easy to pin in place with pegs (or, until we find all the pegs, twigs).
5 Sort out seed packets
As you might be gathering, most things in the shed at this time of year are in a bit of a mess, and our collection of seed packets is similarly failing to conform to order. Thankfully, sorting through them can be a pleasantly relaxing task, which doesn’t even involve stepping outside.
First we discard anything too long beyond its use by date. Also into the bin go any parsnips and carrot seeds that have already been opened (they’re very unlikely to germinate), and any seeds that were so crap last year we won’t bother with again (I’m looking at you, pak choi).
Next we’ll put them in some sort of order. Alphabetical; seasonal; by veg type; by packet colour; by pack height; by feng shue principles – it doesn’t really matter so long as there’s some memorable logic to it. And the then best bit begins – ordering new seeds.
I have a habit of over-buying so I’ll try to restrict myself to just a few packets every other month or so, allowing room for multiple impulse buys throughout the year; Rich will likely do the opposite, under-buying then fretting about how he can quickly fill a late season patch of earth that has the council’s allotment police twitching.
And most excitingly of all, we’ll pick out a few new varieties to try over the coming year then blog about their progress.
This is a sponsored post


I have a full day in the garden planned for this weekend. Think these 5 will be high on my ‘To Do List’. Thanks for sharing and thanks for the tips!
I was out of ideas what to do this week but you’ve filled m schedule with these gardening tasks! Would definitely enjoy tackling these jobs and get my garden ready for spring. Cheers!
As a everyday gardener, I agree with all of the above. I am constantly tackling the winter tasks from November onwards.